Customizing the default font and text color for your email messages in Microsoft Outlook can help you create a consistent and visually appealing email style. In this step-by-step guide, we’ll walk you through the process of changing the default font and text color for email messages in Outlook.
Boost your productivity at unbelievably low costs with our 100% legal Microsoft licenses! Explore super affordable deals, unlock powerful features, and transform your digital experience today. Upgrade now for legitimate value!
Step 1: Launch Microsoft Outlook
Open Microsoft Outlook on your computer
Ensure you’re using the version of Outlook that supports customizing font and text color settings
Step 2: Access Options
Click on the File tab in the top-left corner of the Outlook window
This will open the Outlook Backstage view
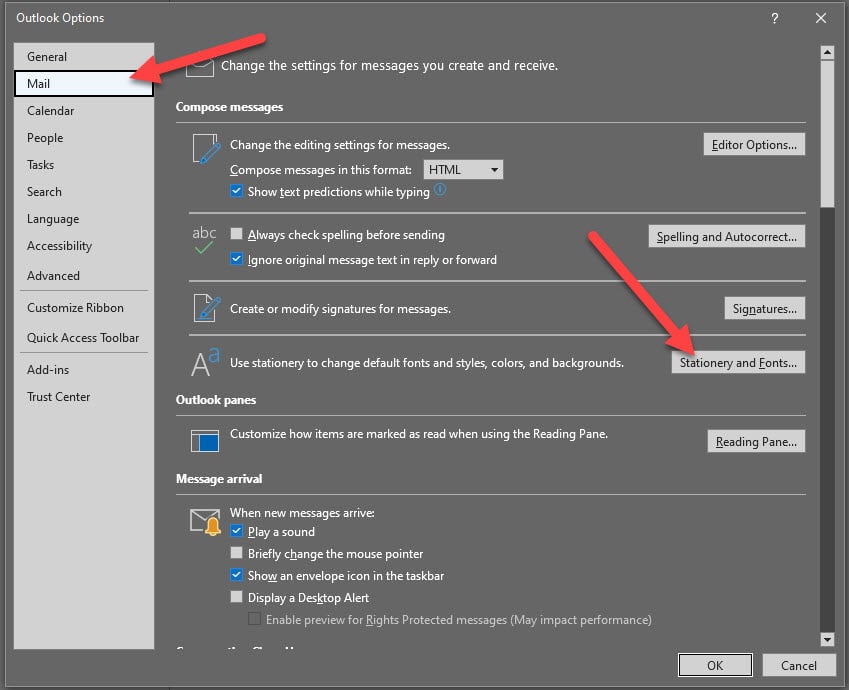
Step 3: Open Outlook Options
In the Outlook Backstage view, click on Options on the left-hand side
This will open the Outlook Options window
Step 4: Navigate to Mail Settings
In the Outlook Options window, click on Mail in the left sidebar to access mail-related settings
Step 5: Click on Stationery and Fonts
Within the Mail settings, click on the Stationery and Fonts button
This will open the Signatures and Stationery window
Step 6: Choose a New Theme
In the Signatures and Stationery window, you’ll see several tabs
Click on the Personal Stationery tab
Step 7: Customize Fonts
Under the Personal Stationery tab, you can customize the font settings for various elements of your email messages
Click on the Font button next to New mail messages to change the default font
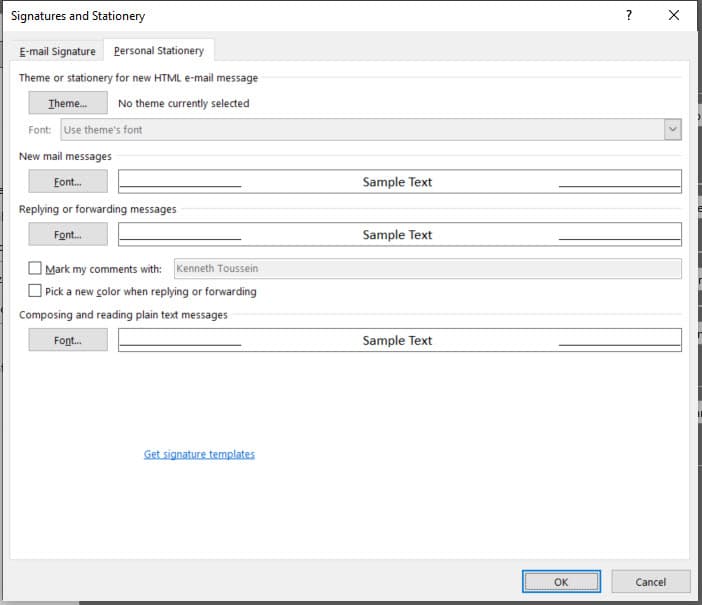
Step 8: Select Font and Text Color
In the Font window, you can choose the desired font, font style, font size, and font color
Adjust these settings to your preferences
Step 9: Apply Changes
After customizing the font settings, click OK to apply the changes
You’ll be back in the Signatures and Stationery window
Step 10: Save Changes and Close
Click OK in the Signatures and Stationery window to save your changes and return to the Outlook Options window
Then, click OK again in the Outlook Options window to close it
Step 11: Test Your Changes
Compose a new email to see how your changes affect the default font and text color
The new font settings should now be applied to your email messages
Step 12: Further Customization (Optional)
Explore other settings in the Signatures and Stationery window to customize your email style even further, such as setting default signature options
Conclusion:
Congratulations! You’ve successfully learned how to change the default font and text color for email messages in Microsoft Outlook. By following these steps, you can create a personalized and consistent email style that reflects your preferences. Stay tuned for more tutorials and tips to enhance your productivity with Microsoft Office tools.